In this post, we will have a look at the new
recommended way of using the Azure Identity library to authenticate to the
Microsoft Graph .NET SDK. Since v4 of the Microsoft Graph SDK, using the Azure.Identity library is the preferred way to auth with the Graph over the previous Microsoft.Graph.Auth method. You can read more about it here: https://github.com/microsoftgraph/msgraph-sdk-dotnet/blob/dev/docs/upgrade-to-v4.md#azure-identity
Specifically, we will have a look at Interactive browser based authentication where the user
would enter their credentials and the Azure Identity library will fetch the
access token based on them.
Before going through the code, let us check out the Azure AD App
registration which would be used to authenticate to the Graph API
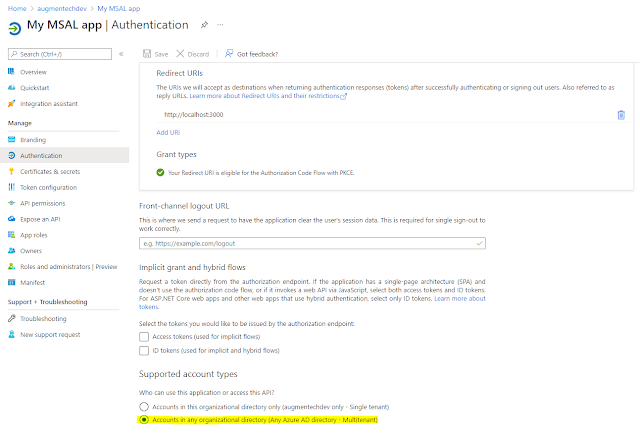
Since we are going to authenticate from a .NET Desktop console application, we will select Desktop as a platform and add the default redirect URIs. In addition, we will also add http://localhost to the list.
The supported account types can be as per your requirements. I have selected the app to be multi tenant.
Select the Allow public client flows to "Yes":
Select the needed scopes:
Once all of this in place, we can use the following code to open a browser
window and authenticate to the Microsoft Graph once the user enters their
credentials:
This file contains bidirectional Unicode text that may be interpreted or compiled differently than what appears below. To review, open the file in an editor that reveals hidden Unicode characters.
Learn more about bidirectional Unicode characters
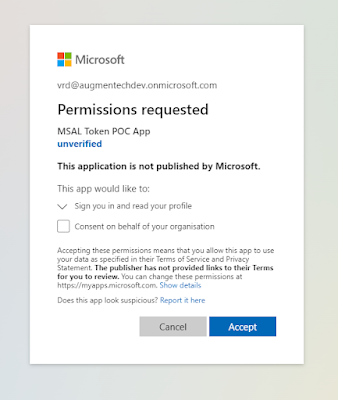
If this is the first time logging into this tenant, you will need to grant permissions to the app:
Once the authentication happens, you will see a similar message in the browser:
and our console window logs the current access token along with the expiry time and also uses the Graph SDK to get the display name of the current user:
This is the second article in my "Building a Microsoft Teams Bot" series. In
this series, I am planning to write down some interesting things I came across
while creating a Microsoft Teams Bot app which is now available on
AppSource: https://appsource.microsoft.com/en-us/product/office/WA200002297
Todays article is around how to create deep links to teams messages from
Adaptive cards. This can be useful in scenarios when you want to send users to
a specific Teams chat message when they click on an Adaptive Card button:
If you are building the deep link manually, it can be grabbed from the
"Copy link" button from the ellipsis menu in a Teams message:
Deep links to personal chats are in a different format compared to channel
messages.
For bots and messaging extensions, this deep link can be built from parts of
the payload sent to the Bot from the Teams platform when the bot is invoked:
This file contains bidirectional Unicode text that may be interpreted or compiled differently than what appears below. To review, open the file in an editor that reveals hidden Unicode characters.
Learn more about bidirectional Unicode characters
Once you have the desired deep link, the next step is to assign it as the URI
to an Adaptive Card button:
This file contains bidirectional Unicode text that may be interpreted or compiled differently than what appears below. To review, open the file in an editor that reveals hidden Unicode characters.
Learn more about bidirectional Unicode characters
I came across an interesting scenario recently: I was working with a React SPA which used Azure AD for authenticating users, and it needed to work with multiple accounts logged in simultaneously. Specifically, we were building an Azure AD
multi tenant application which needed to login to multiple M365 and Azure
tenants and allow the user to manage all tenants at the same time.
The good thing was that MSAL v2 does support working with multiple accounts at the same time.
So in this post, let's see how we are able to do that in a React SPA with MSAL js.
Once this is in place, we can start looking at the code itself. I have take
the MSAL React tutorial as the starting point for this code and modified it to work
with multiple accounts. If you want to build it from scratch, this would be a
good starting point: https://docs.microsoft.com/en-us/azure/active-directory/develop/tutorial-v2-react
The very first thing we would need is to setup the configuration for our
app:
This file contains bidirectional Unicode text that may be interpreted or compiled differently than what appears below. To review, open the file in an editor that reveals hidden Unicode characters.
Learn more about bidirectional Unicode characters
You will notice the authority is set to the /organizations end point. This is
because our app is a multi-tenant app which would be used to login to
different tenants.
With the config, we will now initiate a PublicClientApplication in the
index.tsx file:
This file contains bidirectional Unicode text that may be interpreted or compiled differently than what appears below. To review, open the file in an editor that reveals hidden Unicode characters.
Learn more about bidirectional Unicode characters
This file contains bidirectional Unicode text that may be interpreted or compiled differently than what appears below. To review, open the file in an editor that reveals hidden Unicode characters.
Learn more about bidirectional Unicode characters
There are multiple things happening here. Let's unpack them one by one.
First, we are using the MSAL react useMsalAuthentication hook to setup
the authentication and get the login method which we will use later.
What is also important is the prompt: 'select_account' property in
the request which would help us login with a new account when we are already
signed in with one account.
The AuthenticatedTemplate and UnauthenticatedTemplate MSAL react components help us display different views when at least one user is logged in or no user is logged in respectively.
Next, lets look at the ProfileContent.tsx component:
This file contains bidirectional Unicode text that may be interpreted or compiled differently than what appears below. To review, open the file in an editor that reveals hidden Unicode characters.
Learn more about bidirectional Unicode characters
Based on the homeId of passed in to this component as a property, we are using the PublicClientApplication.acquireTokenSilent method to first get the access token of the relevant user.
Once the accessToken is fetched, we are making a call to the Microsoft Graph to get the basic details of the user. We are using the callMsGraph function for this.
The ProfileData component takes in all properties fetched from the graph and displays it.
The handleLogout function uses the PublicClientApplication.logoutRedirect function to log out the specific user.
So after everything is in place, we would be able to work with multiple users logged in simultaneously at the same time.